There’s something undeniably nostalgic about s’mores. The gooey marshmallow, melted chocolate, and crunchy graham crackers bring back memories of summer bonfires and cozy nights. But what if we told you there’s a way to enjoy that same classic flavor frozen, with an indulgent twist that’s perfect for hot days? Welcome to the magic of Frozen S’mores — a creamy, dreamy, no-bake dessert that transforms your favorite campfire treat into a frozen layered masterpiece.
This recipe brings together chocolate pudding, fluffy marshmallow crème, cream cheese, and whipped topping, all sandwiched between graham crackers. With just a little prep and a lot of chill time, you’ll have a batch of s’mores that are cool, satisfying, and surprisingly easy to make. Whether you’re hosting a summer BBQ or just want to treat your family to something fun, frozen s’mores will become your new go-to dessert.
Table of Contents
Table of Contents
The Origin and Evolution of S’mores
– A Sweet Treat with a Campfire Past
The classic s’more has been a staple in American culture since the 1920s when the Girl Scouts popularized it in their recipe books. Originally a simple treat made from roasted marshmallows, chocolate bars, and graham crackers, s’mores became synonymous with summer fun and camping adventures.
– From Fire Pit to Freezer: The Rise of Frozen S’mores
As home cooks began experimenting with the iconic trio, variations like s’mores brownies, s’mores dip, and s’mores cupcakes took off. But one twist stood out: Frozen S’mores. This chilled version maintains the flavor we love, but with creamy textures and a refreshing finish, ideal for warm weather. With no fire required, this dessert is both kid-friendly and oven-free.

Frozen S’mores – The Best No-Bake Summer Dessert Treat
- Total Time: 6 hours 20 minutes
- Yield: 12 squares (serves 12) 1x
Description
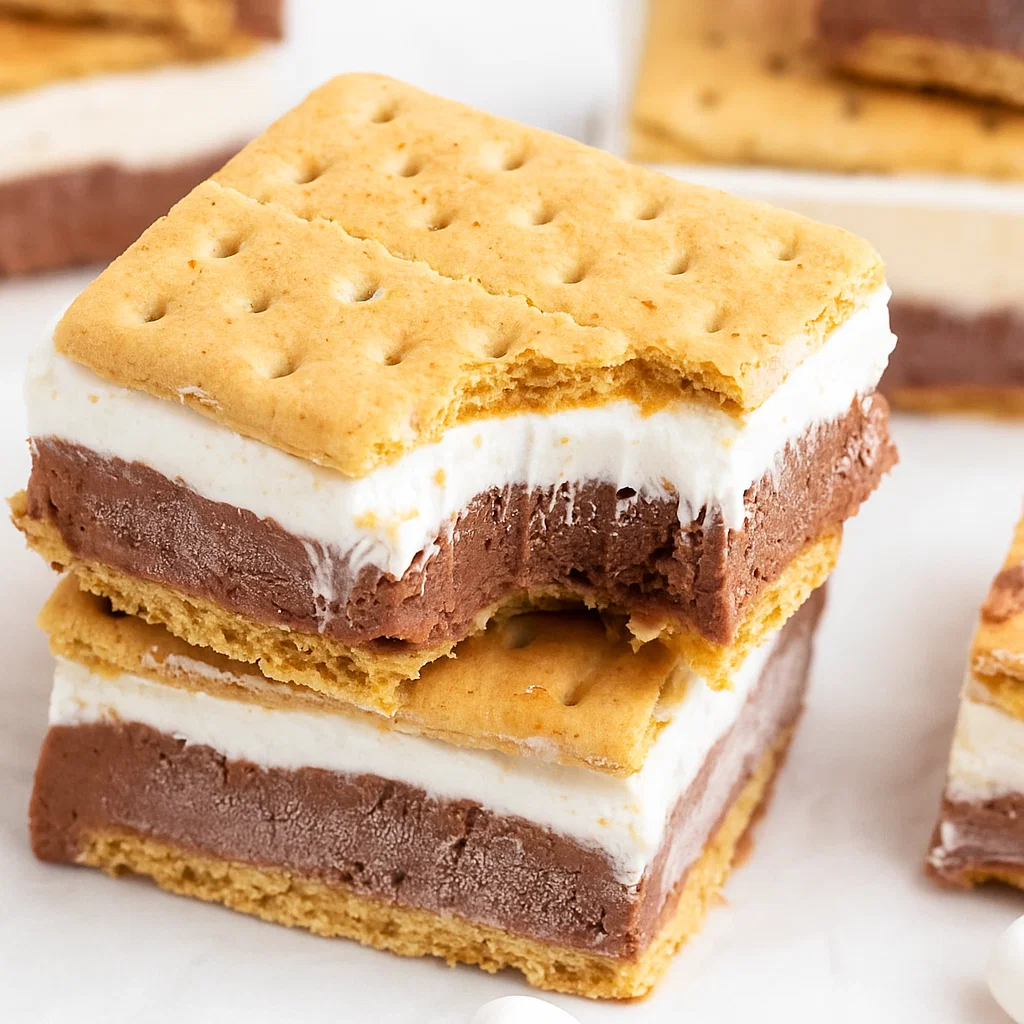
Frozen S’mores are a chilled, no-bake twist on the classic campfire treat. With layers of creamy chocolate pudding, whipped marshmallow filling, and graham crackers, they’re perfect for hot days, parties, or prepping ahead. This refreshing dessert offers all the nostalgic flavor of traditional s’mores but with a cool, sliceable texture everyone will love. It’s kid-friendly, freezer-friendly, and easily customizable with peanut butter, fruit, or extra chocolate!
Ingredients
1 (5.9-ounce) box instant chocolate pudding mix
2½ cups whole milk
2½ cups Cool Whip (thawed and divided)
12 graham crackers (broken in half)
5 ounces cream cheese (softened)
7 ounces marshmallow creme
Pinch of salt
Optional: melted chocolate for drizzle, chocolate graham crackers, mini chocolate chips
Instructions
Prep the pan: Line a 9×13-inch baking dish with parchment paper, leaving extra overhang on the sides for easy lifting later.
Make the chocolate layer: In a mixing bowl, whisk the pudding mix and whole milk until thick and smooth. Stir in ½ cup of Cool Whip.
Layer the base: Lay half of the graham crackers on the bottom of the dish. Spread the pudding mixture over the crackers and chill in the fridge for 10–15 minutes.
Make the marshmallow layer: In a separate bowl, beat softened cream cheese and marshmallow creme until smooth. Fold in remaining 2 cups of Cool Whip and a pinch of salt.
Finish the layers: Spread the marshmallow mixture evenly over the chilled chocolate layer. Add the remaining graham crackers on top to create sandwiches.
Freeze: Cover the pan with foil and freeze for at least 6 hours or overnight until firm.
Serve: Lift the layered s’mores out using the parchment, then slice into 12 squares using the graham crackers as a guide. Let soften for 10–15 minutes at room temperature before serving, or microwave for 5–10 seconds.
Notes
Make-ahead tip: These can be made 1–2 days in advance and stored in the freezer.
Storage: Wrap individual squares in plastic wrap and place them in a freezer-safe container. Keeps well for up to 2 months.
Variations: Add peanut butter to the pudding, mix in mini chocolate chips, or try using chocolate graham crackers.
Fruit twist: Add fresh strawberries or bananas for extra texture and natural sweetness.
Slicing tip: Run a sharp knife under hot water and wipe between cuts for cleaner squares.
- Prep Time: 20 minutes
- Chill Time: 6 hours (in freezer)
- Cook Time: 0 minutes (no cooking required)
- Category: Desserts, No-Bake Recipes, Summer Treats
- Cuisine: American
Nutrition
- Calories: 285–310 kcal
- Sugar: 23g
- Sodium: 200mg
- Fat: 14g
- Saturated Fat: 8g
- Carbohydrates: 37g
- Fiber: 1g
- Protein: 3g
- Cholesterol: 20mg
Essential Ingredients for Frozen S’mores
– Key Ingredients You’ll Need
Making frozen s’mores doesn’t require anything fancy—just the right blend of rich and creamy textures with classic s’mores flavor. Here’s what you need for the ultimate bite:
| Ingredient | Quantity | Purpose |
|---|---|---|
| Instant chocolate pudding mix | 1 box (5.9 oz) | Forms the base chocolate layer |
| Whole milk | 2 ½ cups | Helps mix the pudding to creamy consistency |
| Cool Whip (thawed) | 2 ½ cups (divided) | Adds fluff and lightness |
| Graham crackers | 12, broken in halves | Creates the sandwich structure |
| Cream cheese (room temp) | 5 oz | Gives richness to the marshmallow layer |
| Marshmallow creme | 7 oz | Offers that signature gooey texture |
| Salt | Pinch | Enhances the sweetness |
These ingredients work in harmony to create a frozen treat that mirrors the taste of traditional s’mores, but with a cool and creamy texture perfect for summer.

– Ingredient Substitutions for Dietary Needs
Want to make this recipe a bit healthier or accommodate dietary restrictions? Here are a few easy swaps:
- Dairy-free option: Use almond or oat milk with dairy-free whipped topping and vegan cream cheese.
- Sugar-free version: Opt for sugar-free pudding and graham crackers.
- Gluten-free version: Use certified gluten-free graham crackers for a celiac-safe treat.
You can even try flavored pudding like cookies & cream or peanut butter chocolate for a fun twist!
– Where to Buy Specialty Items
While most of the ingredients are supermarket staples, you may find better deals or wider options online for:
- Marshmallow creme: Often stocked in the baking aisle.
- Cool Whip alternatives: Check natural food sections for organic or plant-based versions.
- Flavored graham crackers: Chocolate or cinnamon-flavored grahams can be found seasonally.
Step-by-Step: How to Make Frozen S’mores
– Prepare the Base: Chocolate Pudding Layer
The first step in making frozen s’mores is creating the decadent chocolate foundation. Here’s how:
- In a medium-sized bowl, whisk together the instant chocolate pudding mix with 2½ cups of whole milk.
- Stir in ½ cup of Cool Whip to give the pudding a fluffy, mousse-like texture.
- Line a 9×13-inch baking dish with parchment paper, leaving enough overhang for lifting later.
- Lay half of the graham crackers across the bottom of the dish in an even layer.
- Spread the chocolate mixture over the graham cracker base and smooth it out with a spatula.
- Place the dish in the fridge for about 10–15 minutes to firm up slightly.
– Create the Creamy Marshmallow Layer
Once your pudding layer is chilled, it’s time to add the creamy top layer:
- In a clean bowl, beat 5 ounces of softened cream cheese with 7 ounces of marshmallow creme until smooth.
- Fold in the remaining 2 cups of Cool Whip and a pinch of salt to balance the sweetness.
- Spread this mixture evenly over the chilled pudding layer, smoothing out the top as best as possible.
This layer is what gives frozen s’mores that fluffy, cloud-like texture. Don’t skip the salt—it enhances the depth of flavor.
– Add the Top Layer and Freeze
- Place the remaining graham crackers across the top, lining them up with the bottom layer for easy slicing.
- Cover the dish with foil and freeze for at least 6 hours, or until firm.
Tip: If you love chocolate, you can even spread melted chocolate under the bottom graham crackers or use chocolate graham crackers instead for an extra indulgent version.
– Slice and Serve Like a Pro
Once fully frozen:
- Use the parchment paper overhang to lift the slab out of the dish.
- Transfer to a cutting board and, using the graham crackers as a guide, slice into 12 squares.
- Trim any excess filling from the sides for clean, sharp edges.
If you’re not eating them right away, wrap each square in plastic wrap and store in a zip-top freezer bag.
For softer bites, let the squares rest at room temperature for 10–15 minutes before serving.

👉 Enjoyed this Recipe? Discover more tasty ideas by following us on Facebook for daily kitchen inspiration and helpful cooking tips. Don’t forget to explore our Pinterest boards packed with delicious recipes, seasonal favorites, and meal planning ideas. Let’s cook something amazing together!
Best Storage Tips & Make-Ahead Hacks for Frozen S’mores
– How to Store Frozen S’mores Properly
Storage is key when it comes to preserving both the texture and flavor of your frozen s’mores. Done right, these treats can last up to two months without any loss of quality.
Here’s how to do it:
- Individually wrap each frozen s’more sandwich in plastic wrap to prevent freezer burn.
- Place the wrapped squares into a freezer-safe container or zip-top freezer bag.
- Label the container with the date so you know when they were made.
- Keep the container near the center of your freezer, away from fluctuating temperatures near the door.
Pro Tip: Want to snack smarter? Separate layers with parchment paper so they don’t stick together.
– Make-Ahead Options for Busy Weeks
One of the best things about frozen s’mores is that you can prepare them ahead of time. In fact, they taste even better after chilling for 24+ hours.
Here’s how to optimize your make-ahead game:
- Weekend Prep: Make a full batch on Sunday, slice and wrap, and you’ve got a go-to dessert all week long.
- Portion Control: Slice into smaller squares for lunchbox treats or mini bites for parties.
- Party Hack: Prep a double batch, then layer in a container with wax paper for effortless party servings.
– How Long to Let Them Sit Before Eating
Frozen s’mores are best when slightly softened, so remove them from the freezer about 15 minutes before serving. This gives the layers time to thaw just enough for the flavors to shine and the texture to melt in your mouth.
If you’re in a hurry, microwave on low for 5–10 seconds—just be careful not to overdo it!
– Signs It’s Time to Toss
Even frozen desserts have a shelf life. Toss your frozen s’mores if:
- You notice freezer burn (white, dried-out spots)
- They taste icy or bland
- The graham crackers become soggy after thawing
Fun Variations and Creative Twists on Frozen S’mores
– Chocolate Lover’s Dream
Want to double down on chocolate? Here are rich, indulgent upgrades:
- Use chocolate graham crackers instead of honey or cinnamon-flavored ones.
- Spread melted semi-sweet chocolate on the bottom graham cracker before adding the pudding layer.
- Sprinkle mini chocolate chips between the layers for extra texture and crunch.
- Swap regular pudding for dark chocolate mousse to elevate the flavor.
– Fruity Frozen S’mores
Add a fruity twist that pairs perfectly with the creamy layers:
- Mix fresh strawberries or bananas into the pudding before spreading.
- Fold in raspberry puree to the cream cheese layer for a tangy kick.
- Use berry-flavored marshmallow crème (available in select stores) for a playful change.
– Peanut Butter Explosion
There’s no denying that peanut butter and chocolate are a dream combo. Try this:
- Add ¼ cup of peanut butter to the chocolate pudding for a Reese’s-style flavor.
- Layer in crushed peanut butter cups or chopped roasted peanuts for added crunch.
- Use graham cracker and peanut butter sandwich cookies as the base and top.
– S’mores with a Crunch
Want to boost the texture and bring something new to each bite? Try:
- A sprinkle of toasted coconut flakes or crushed pretzels between layers.
- Swap graham crackers for waffle cookies, shortbread, or thin biscotti.
– Kid-Friendly & Colorful Versions
For a kid-approved version, try:
- Adding rainbow sprinkles into the cream cheese layer.
- Using flavored pudding, like butterscotch or cookies & cream.
- Let kids build their own mini frozen s’mores with toppings and mix-ins at a party.
This not only adds fun but turns dessert into a full-blown activity.
Frozen S’mores – Frequently Asked Questions (FAQ)
Can you put s’mores in the fridge?
Yes, but keep in mind the fridge is ideal only for short-term chilling, not long-term storage. If you just need to firm up the layers before freezing or serving within a few hours, the fridge works fine. However, since frozen s’mores are meant to be served cold and hold their structure, the freezer is a better choice. Refrigerated s’mores may become too soft and messy after a while.
How to make s’mores healthier?
Making frozen s’mores a little healthier is easy! Just swap out a few ingredients. Use non-dairy milk like almond or oat milk instead of regular milk. Choose a lighter whipped topping like coconut whip. Look for graham crackers that are low in sugar or gluten-free. And if you want even less sugar, try homemade marshmallow fluff or use dark chocolate. You can even add fresh fruits like banana slices or strawberries to give them a naturally sweet boost.
Can you freeze s’mores?
Yes—and that’s what makes this recipe so special! Freezing turns regular s’mores into a cool and creamy dessert that’s easy to cut and serve. Once frozen, they hold their shape and can be stored for weeks. Just wrap them well and store in a freezer-safe container to keep them fresh and tasty.
How long should you heat up frozen s’mores?
Frozen s’mores are best enjoyed slightly softened. Just take them out of the freezer and leave them on the counter for about 10 to 15 minutes. That way, they soften up just enough to bite into. If you’re in a hurry, you can microwave one for about 5 to 10 seconds, but don’t go longer or it might melt too much.
Serving Ideas and Presentation Tips for Frozen S’mores
– How to Serve Frozen S’mores Like a Pro
Frozen s’mores are already delicious, but how you present them can take them from casual treat to wow-worthy dessert. Here’s how to make them look as good as they taste:
- Slice them neatly using a sharp knife for clean edges. Wipe the blade between cuts to avoid mess.
- Let them rest at room temperature for 10 minutes before serving. This softens the layers just enough for the perfect bite.
- Serve them on a chilled platter for hot summer days, especially if you’re outdoors.
– Fun Toppings and Garnishes
Toppings can add flavor, crunch, and a whole lot of fun. Try these simple extras:
- Dust with cocoa powder or powdered sugar for a classy finish.
- Add a drizzle of melted chocolate or caramel just before serving.
- Sprinkle with crushed graham crackers, mini marshmallows, or chocolate chips for extra texture.
Let guests customize their own frozen s’mores squares by setting up a topping bar with bowls of crushed cookies, berries, or candy bits.
– Kid-Friendly Presentation Ideas
Make it fun for little ones by:
- Adding colorful sprinkles on top of each square.
- Cutting the s’mores into mini bites with a cookie cutter.
- Serving them on popsicle sticks for easy, no-mess eating.
Frozen s’mores make a great birthday treat, picnic dessert, or after-school snack that both kids and adults will love.

Tips, Tricks & Troubleshooting Frozen S’mores
– Common Mistakes to Avoid
Even though frozen s’mores are easy to make, a few small missteps can mess with the results. Here’s what to watch out for:
1. Skipping the chill time:
Don’t rush the freezing step. If the layers aren’t fully frozen, the bars will fall apart when you slice them. Give them at least 6 hours, or overnight if possible.
2. Over-whipping the cream cheese layer:
Mix until smooth but don’t beat too much. Overmixing can make the top layer too runny.
3. Using warm ingredients:
Make sure everything, especially the pudding and Cool Whip, is cold. This helps the dessert set faster and prevents soggy crackers.
4. Storing uncovered:
Always wrap individual squares in plastic wrap or foil. This prevents freezer burn and keeps them fresh.
– Expert Tricks for Perfect Results
Want to take your frozen s’mores from good to great? Try these pro tips:
- Use parchment paper with overhang to lift the bars out cleanly and easily.
- Score the top graham crackers with a knife before freezing. This helps guide your cuts later.
- Chill the pudding layer in the fridge before adding the cream cheese layer so the dessert holds its shape better.
- Try a toothpick test—stick one in and if it stands upright, your s’mores are ready to slice.
Looking for another foolproof no-bake recipe? Check out Oreo Pudding Pie for more dessert confidence!
– What to Do If They Don’t Set Properly
If your frozen s’mores are still soft and messy, here’s how to fix them:
- Refreeze for another 2–3 hours, especially if the layers weren’t cold when you assembled them.
- If they’re too soft to slice, run a butter knife along the edges and pop the pan in the freezer again with the lid off.
- For a quick save, turn it into a parfait—just scoop into a glass and layer with extra crushed grahams.
Conclusion and Final Thoughts
Frozen s’mores are a brilliant way to enjoy a nostalgic treat with a modern, refreshing twist. With layers of cool chocolate pudding, whipped marshmallow cream, and crunchy graham crackers, this no-bake dessert is not only easy to make but also easy to love.
Whether you’re serving them at a summer party, prepping them for the week, or handing them out as after-school snacks, frozen s’mores deliver fun, flavor, and flexibility. You can make them ahead, mix in different flavors, and even turn them into a DIY dessert bar for guests.
From helpful tips and storage hacks to fun variations, this recipe proves you don’t need a campfire to enjoy that classic s’mores experience. So grab your ingredients, clear a freezer shelf, and get ready to wow your taste buds!
Looking for more fun frozen treats? Don’t miss our crowd-pleasing Fruity Pebbles Cheesecake Tacos or fruity chillers like the Raspberry Chia Pudding.