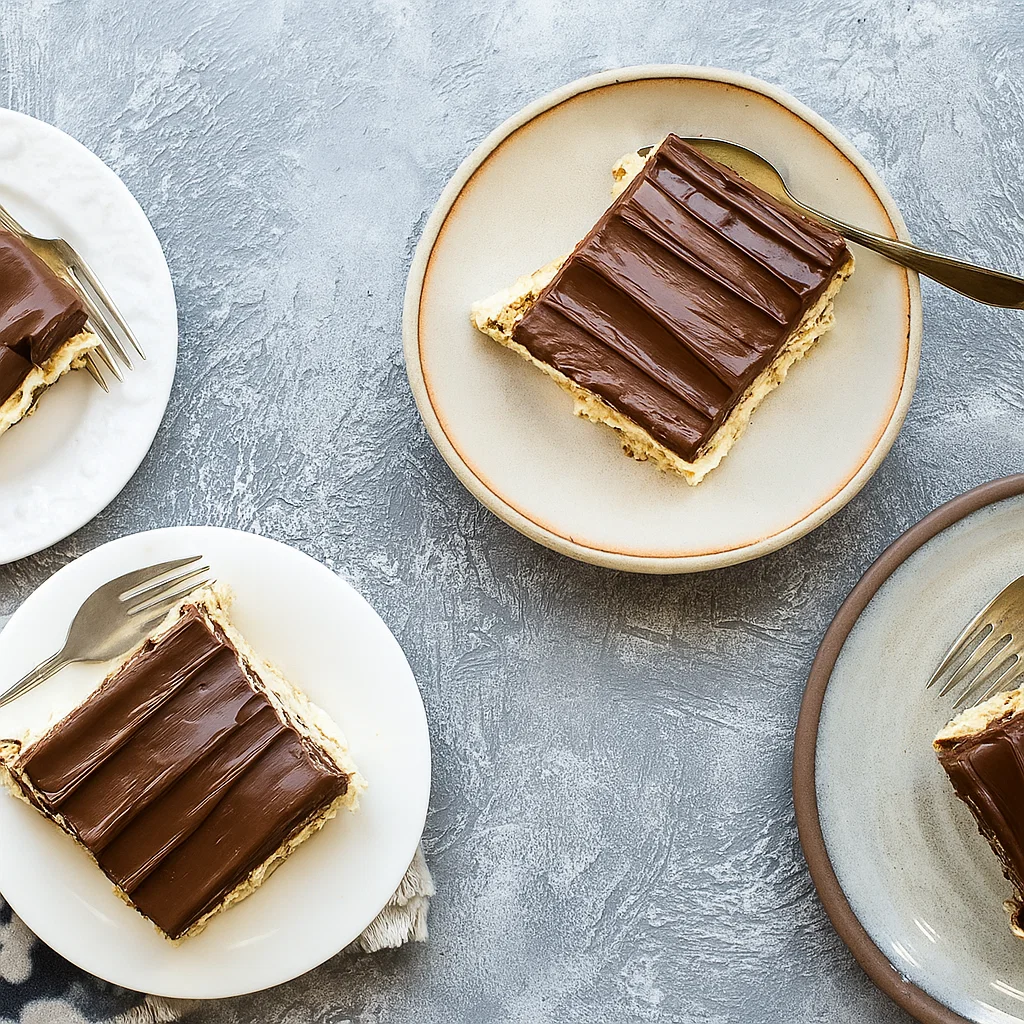
If you’re craving a creamy, chocolatey dessert that takes almost no effort and no oven, then Chocolate Eclair Cake is about to be your new favorite recipe. This timeless Midwestern treat is everything you want in a no-bake dessert: layers of soft graham crackers, silky vanilla pudding, whipped topping, and a rich layer of chocolate frosting. It comes together in just 10 minutes—and after a chill in the fridge, you’ve got a crowd-pleaser worthy of any occasion.
I still remember the first time I had chocolate eclair cake. It was a humid summer in Michigan. My neighbor, Miss Carol, who could whip up miracles from a box of pudding and graham crackers, brought it over to our block party. I took one bite—and I was hooked. It was creamy, chocolatey, and had that nostalgic, from-grandma’s-kitchen vibe. Since then, it’s been my go-to dessert for family barbecues, holiday potlucks, and every “I need chocolate now” emergency.
Let’s explore what makes this humble dessert so irresistible—and how you can make it perfectly every time.
Table of Contents
Table of Contents

A Midwestern Classic: What Makes Chocolate Eclair Cake So Special
Why This No-Bake Favorite Has Stuck Around for Generations
There’s a reason you’ll find Chocolate Eclair Cake at so many Midwestern potlucks, family reunions, and summer gatherings. It’s not just that it’s ridiculously easy to make. It’s that this cake delivers big flavor with zero stress. Somewhere between a pudding dessert and an icebox cake, this no-bake beauty captures everything we love about homemade sweets—without the oven or baking pans.
Born from the kind of kitchen creativity that turns pantry staples into magic, this dessert feels both nostalgic and timeless. With layers of soft graham crackers, creamy vanilla pudding, and whipped topping, it’s finished with a luscious blanket of chocolate frosting that pulls it all together. Each bite delivers that melt-in-your-mouth texture that gets even better after a night in the fridge.
What’s more Midwestern than taking a shortcut and making it delicious?
Why Layered No-Bake Desserts Like Chocolate Eclair Cake Win Every Time
When it comes to effortless desserts that still impress, layered no-bake recipes like Chocolate Eclair Cake are hard to beat. These desserts deliver incredible texture and taste with barely any prep time. You’re stacking simple ingredients into something that looks elegant and feels homemade—without ever turning on the oven.
What makes this type of dessert a go-to in American kitchens? It checks off all the right boxes:
- Minimal ingredients
- No baking required
- Easily feeds a crowd
- Perfect for prepping ahead
That’s why Chocolate Eclair Cake is such a standout. In just a few layers—graham crackers, creamy pudding, fluffy topping, and glossy chocolate—you’ve got a chilled treat that keeps guests coming back for seconds.
Plus, there’s something show-stopping about slicing into a dessert that’s been resting in the fridge, its layers softened just enough to blend perfectly. From birthday dinners to backyard BBQs, this cake always finds its place on the table.
Print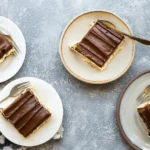
Chocolate Eclair Cake: The Best No-Bake Dessert For Every Occasion
- Total Time: 8 hours 15 minutes (includes chilling time)
- Yield: Serves 16–20 slices depending on portion size 1x
Description
This easy Chocolate Eclair Cake is a no-bake dessert layered with graham crackers, vanilla pudding, whipped topping, and rich chocolate frosting. It’s creamy, chilled, and incredibly simple to prepare—no oven required. Perfect for holidays, potlucks, or a last-minute sweet treat that tastes even better the next day.
Ingredients
2 (3.4 oz) packages instant vanilla pudding mix
3 ½ cups cold milk (whole milk preferred for creamier texture)
1 (8 oz) container whipped topping, thawed (e.g., Cool Whip)
1 box graham crackers (regular or honey flavor)
1 (16 oz) tub chocolate frosting (dark or milk chocolate)
Instructions
In a large mixing bowl, whisk together the pudding mix and cold milk until smooth and thickened (about 2 minutes).
Gently fold in the thawed whipped topping until fully combined and fluffy.
In a 9×13-inch baking dish, arrange a single layer of graham crackers to fully cover the bottom.
Spread half of the pudding mixture over the crackers and smooth it out evenly to the edges.
Add a second layer of graham crackers on top of the pudding.
Spread the remaining pudding mixture over the second cracker layer.
Place a third layer of graham crackers on top.
Microwave the chocolate frosting for 15–20 seconds to soften, then stir well.
Gently spread the warmed frosting over the top cracker layer, covering it fully.
Cover the dish tightly with foil or plastic wrap and refrigerate for at least 8 hours or overnight.
Slice into squares and serve chilled.
Notes
Whipped Topping Substitute: Use homemade whipped cream for a fresher flavor—simply whip 1 cup heavy cream with 2 tbsp powdered sugar until stiff peaks form.
Pudding Swap: Homemade pastry cream works well in place of instant pudding for a more traditional texture.
Frosting Tip: Warming the frosting makes it spread easily without cracking the cracker layer.
Flavor Boost: Try adding thinly sliced strawberries or raspberries between layers for a fruity twist.
Make Ahead: Best when chilled overnight—perfect for prepping in advance.
- Prep Time: 15 minutes
- Cook Time: 0 minutes (no baking required)
- Category: Dessert, No-Bake Recipe
- Cuisine: American, Midwestern
Nutrition
- Serving Size: 1 square slice (approx. 2.5 x 2.5 inches)
- Calories: 264 kcal
- Sugar: 30 g
- Sodium: 261 mg
- Fat: 9 g
- Saturated Fat: 4 g
- Carbohydrates: 44 g
- Fiber: 1 g
- Protein: 3 g
- Cholesterol: 5 mg
Chocolate Eclair Cake Ingredients and Their Role
Breaking Down the Building Blocks of Chocolate Eclair Cake
One of the best things about making Chocolate Eclair Cake is how basic the ingredients are. You’ll find almost everything you need at your local grocery store—or probably already in your pantry. But don’t let the simplicity fool you. Each component plays a key role in creating the signature flavor and texture of this iconic no-bake dessert.
Here’s what you need and why it matters:
| Ingredient | Purpose |
|---|---|
| Instant Vanilla Pudding | Adds creamy richness and structure to the filling |
| Cold Milk | Hydrates the pudding and keeps the texture light |
| Whipped Topping | Creates a fluffy, smooth consistency in the pudding layer |
| Graham Crackers | Acts as the “cake” layers, softening to a tender bite in the fridge |
| Chocolate Frosting | Adds a rich, glossy top layer for that perfect chocolatey finish |
Let’s take a closer look at how each of these contributes to dessert perfection.

Instant Pudding and Milk: The Creamy Foundation
The vanilla pudding layer is the creamy heart of this dessert. Using instant pudding saves time and effort—you simply whisk it with milk until it thickens. You can go with whole milk for extra creaminess or use 2% milk if that’s what you have on hand.
Want to skip processed mixes? Feel free to make homemade pastry cream instead for a more from-scratch feel without sacrificing flavor.
Whipped Topping: Lightness and Lift
This is where the magic really starts. Fold in thawed whipped topping to the prepared pudding, and you’ve got a mousse-like filling that’s light, fluffy, and easy to spread. It balances out the richness of the chocolate frosting and gives the cake its cloud-like texture.
If you’re avoiding pre-made products, you can easily substitute homemade whipped cream using heavy cream, powdered sugar, and vanilla extract.
Graham Crackers: The Secret to the “Cake” Layers
At first glance, graham crackers might seem like an unusual choice for cake layers. But once this dessert sits in the fridge for several hours, the crackers soften just enough to create that perfect sponge-like texture. They mimic cake without baking—and that’s exactly why this recipe is so genius.
Break the crackers as needed to fit your pan and ensure full coverage in each layer.
Don’t miss our No-Bake Chocolate Oatmeal Bars for another clever dessert that skips the oven but brings big satisfaction.
Chocolate Frosting: The Glossy Top That Seals the Deal
This is where everything gets tied together. A tub of rich chocolate frosting, slightly warmed for easy spreading, creates the ultimate top layer. It hardens just enough in the fridge to give that satisfying finish without overpowering the lighter pudding below.
For an even more decadent version, swap in your favorite homemade chocolate frosting. Either way, it adds that chocolate eclair flavor in every bite.
Step-by-Step: How to Make Chocolate Eclair Cake
Start with Simple Prep for a Flawless Chocolate Eclair Cake
Making a perfect Chocolate Eclair Cake doesn’t require professional baking skills—it just takes a few basic tools and easy-to-find ingredients. Before you start assembling, grab your 9×13-inch pan, a mixing bowl, and a spatula. Keep all your ingredients nearby to speed things up.
Here’s what you’ll need to create this irresistible no-bake cake:
- 2 packages of instant vanilla pudding (3.4 oz each)
- 3 ½ cups cold milk
- 1 container of whipped topping (8 oz), thawed
- 1 box of graham crackers
- 1 can of chocolate frosting
Now let’s bring your Chocolate Eclair Cake to life, one easy step at a time.
Step 1: Mix the Creamy Filling
Pour the vanilla pudding mix into a large bowl and add the cold milk. Use a whisk to blend until smooth and slightly thickened. This takes about 2 minutes. Once ready, gently fold in the thawed whipped topping until the mixture becomes light and fluffy. This creamy filling is the heart of your Chocolate Eclair Cake—don’t rush it.
If you prefer from-scratch baking, feel free to substitute with homemade pastry cream and freshly whipped cream.
Step 2: Build Your First Layer
Place a single layer of graham crackers along the bottom of your baking pan. Break some pieces if needed to completely cover the surface. These crackers act as the “cake” foundation in your Chocolate Eclair Cake, softening over time to mimic the texture of sponge cake.
Step 3: Add the First Cream Layer
Spoon half of the pudding and whipped topping mixture over the graham crackers. Use a spatula to smooth it evenly across the surface, making sure to fill every corner. This creamy layer gives your Chocolate Eclair Cake its signature soft bite and luscious texture.
Step 4: Stack Another Layer of Graham Crackers
Carefully place another layer of graham crackers over the pudding mixture. These layers are what give the cake structure and help it slice cleanly after chilling.
Step 5: Spread the Final Layer of Filling
Pour the rest of the pudding mixture over the second graham cracker layer and spread it out evenly. Now your Chocolate Eclair Cake is nearly ready for its final, chocolaty touch.
Step 6: Top with Chocolate Frosting
Slightly warm the chocolate frosting in the microwave—about 15 to 20 seconds should do it. Stir until smooth and spreadable. Gently spread the frosting across the top graham cracker layer, taking care not to tear or shift the crackers underneath. A smooth layer of frosting is key to achieving the beautiful top that defines a great Chocolate Eclair Cake.
Step 7: Cover and Refrigerate
Cover your pan tightly with plastic wrap or foil and refrigerate the cake for at least 8 hours, though overnight is best. This step is essential—it’s when the graham crackers soften, the layers bond, and the flavors blend into that melt-in-your-mouth perfection only a Chocolate Eclair Cake can deliver.
When you’re ready to serve, slice it into squares and enjoy it chilled. Every forkful offers that nostalgic bakery-style eclair taste—with no baking, no stress, and maximum flavor.

👉 Enjoyed this Recipe? Discover more tasty ideas by following us on Facebook for daily kitchen inspiration and helpful cooking tips. Don’t forget to explore our Pinterest boards packed with delicious recipes, seasonal favorites, and meal planning ideas. Let’s cook something amazing together!
Tips to Get the Perfect Texture and Flavor
Let Time Do the Work: Why Chilling Is Crucial
When it comes to making a truly great Chocolate Eclair Cake, time is one of your most important ingredients. Unlike baked cakes that are ready as soon as they cool, this dessert needs to sit in the fridge to reach its peak texture. That resting period allows the graham crackers to absorb moisture from the pudding, transforming them from crunchy squares into soft, cake-like layers.
For the best results, chill the cake for a minimum of 8 hours, though overnight is ideal. If you’re planning for a special event or dinner, make the cake a day in advance—it’ll be even better when served the next day.
Choose the Right Dish for Even Results
Using a proper pan helps you build neat layers and control portions. A 9×13-inch glass or ceramic dish is perfect. It gives enough depth to stack the layers without overflowing and lets you see how the dessert is forming.
Here’s how to get clean layers:
- Arrange each graham cracker layer flat, pressing gently into place
- Spread the filling carefully, smoothing it all the way to the edges
- Apply the frosting in gentle, even strokes so it sets nicely on top
This way, your Chocolate Eclair Cake looks just as good as it tastes.
Slicing Like a Pro: No Mess, No Crumbles
A chilled cake is easier to cut—but only if you use the right tools. To get perfect, bakery-style squares:
- Use a long, sharp knife
- Dip it in hot water, then wipe dry before slicing
- Clean the blade between cuts
- Lift pieces gently using a flat spatula or pie server
With softened graham crackers and thick pudding, each square holds its shape—no more messy scoops or sliding layers.
Why This Cake Gets Better with Time
Many desserts dry out or lose texture the longer they sit. Not this one. As your Chocolate Eclair Cake chills, the layers blend together, the flavors deepen, and the texture improves. After 24 hours, the graham crackers become soft and tender—almost like sponge cake—and the pudding has time to set completely.
This makes it one of the best desserts to prepare ahead. You don’t just save time the day of your event—you actually improve the flavor while doing it.
So go ahead, make it the night before. When it’s time to slice and serve, you’ll have a dessert that’s creamy, beautiful, and absolutely effortless.
Make-Ahead and Storage Instructions
Planning Ahead with Chocolate Eclair Cake
One of the best things about Chocolate Eclair Cake—besides how easy it is—is how well it fits into your schedule. This is the kind of dessert you can prep ahead without worrying about it drying out or losing flavor. In fact, it only gets better with time.
If you’re making it for a party or event, try to assemble it the night before. Letting the cake sit in the fridge overnight allows the graham crackers to fully soften into a tender, cake-like texture, while the pudding and whipped layers firm up just right. That chilling time brings the flavors together beautifully.
And yes, you can even prepare it up to 48 hours in advance. Just be sure it’s well covered and stored in the refrigerator.
How to Store It for Best Results
To keep your Chocolate Eclair Cake tasting fresh and creamy, here’s what to do:
- Refrigeration is a must: This dessert needs to stay cold. After assembling it, cover the dish tightly with plastic wrap or foil and place it in the fridge.
- Use an airtight container (or cover the baking dish well) to prevent the cake from drying out or absorbing fridge odors.
- Shelf life: It stays delicious for up to 4 days if properly stored—just expect the texture to get softer with time (which most people love!).
Freezing Tips: Yes, You Can Freeze It (With a Trick)
If you want to save a few slices—or even a full tray—for later, freezing is definitely an option. However, there’s a trick: it’s better to freeze before adding the chocolate frosting. This helps preserve the texture and keeps the top looking fresh after thawing.
Here’s how to freeze it:
- Assemble the cake layers without frosting
- Wrap it securely with plastic wrap, followed by a layer of foil
- Label and freeze for up to 2 months
- When ready, thaw in the fridge overnight
- Spread chocolate frosting on top just before serving
This method keeps the texture soft and the presentation neat when you’re ready to enjoy it again.
Looking for other cool treats you can prep ahead? Check out our Frozen S’mores—perfect for summer snacking and freezer-friendly.
Variations to Try with Your Chocolate Eclair Cake
Make It Your Own: Twist the Classic Chocolate Eclair Cake
The beauty of Chocolate Eclair Cake is that it’s endlessly adaptable. Once you’ve mastered the classic recipe, you can start playing around with flavors, toppings, and textures. Whether you’re baking for picky eaters, kids, or guests with dietary restrictions, there’s a version of this no-bake cake for everyone.
Let’s explore a few delicious ways to mix it up without losing that creamy, layered goodness.
Fruit-Filled Chocolate Eclair Cake
Add some fresh or frozen fruit between the layers to create a bright, fruity twist. Berries work best because they balance the richness of the pudding and chocolate.
Popular fruit variations include:
- Strawberries (sliced thin for even layers)
- Raspberries (whole or mashed slightly)
- Bananas (add right before serving to avoid browning)
This version is especially refreshing in spring and summer—and it makes for a beautiful presentation when sliced.
Peanut Butter Chocolate Eclair Cake
If you’re a fan of chocolate and peanut butter together, this variation is a must-try. Simply swirl a few tablespoons of creamy peanut butter into the pudding mixture before layering. You can even drizzle melted peanut butter on top of the chocolate frosting for extra wow factor.
Optional Add-Ons:
- Crushed peanut butter cups between layers
- A sprinkle of chopped roasted peanuts on top for crunch
The salty-sweet combo makes this version rich, decadent, and totally unforgettable.
Gluten-Free Chocolate Eclair Cake
Want to make it gluten-free? No problem. Just swap out the graham crackers for a certified gluten-free brand. Most of the other ingredients—like pudding, whipped topping, and frosting—already come in gluten-free options (just double-check the labels).
You’ll still get that soft, cake-like texture after chilling, and no one will miss the gluten.
Mocha or Espresso Eclair Cake
Craving a grown-up flavor? Stir a tablespoon of instant espresso powder into the pudding mix or the chocolate frosting. This adds a bold, coffee-infused note that pairs perfectly with the rich chocolate.
It’s a sophisticated upgrade that’s perfect for dinner parties or adult celebrations.
Kid-Friendly Customizations
Kids love when desserts feel playful—so let them help! Try adding:
- Mini chocolate chips between layers
- Crushed Oreos mixed into the pudding
- Rainbow sprinkles on top before chilling
It’s a fun way to get the family involved and make the Chocolate Eclair Cake even more special.
Chocolate Eclair Cake vs. Classic Chocolate Cakes
The No-Bake Champion vs. Traditional Favorite
While Chocolate Eclair Cake and traditional chocolate layer cakes both satisfy sweet cravings, they couldn’t be more different in how they’re made and enjoyed. One brings the magic of simplicity and convenience, while the other relies on baking know-how and time. But each has its place, depending on what you’re looking for.
Here’s how they truly compare—beyond the frosting.
Prep Method: Chilling vs. Baking
Traditional chocolate cakes are baked, which means preheating ovens, watching bake times, and cooling before frosting. Chocolate Eclair Cake, on the other hand, skips the oven entirely. Instead of baking, you layer ingredients and let the fridge do all the work.
If you’re short on time or don’t want to deal with oven heat—especially in summer—the no-bake route is a clear winner.
Time and Effort Required
Baking a chocolate cake from scratch takes time—mixing, baking, cooling, then decorating. Even with a mix, you’re looking at over an hour. Chocolate Eclair Cake? You can throw it together in under 15 minutes. It’s one of the easiest desserts out there.
That’s why it’s ideal for last-minute events, potlucks, or nights when dessert sounds good—but work doesn’t.
Texture and Eating Experience
What really sets them apart is the texture. A baked cake offers fluffiness and a crumbly bite. Chocolate Eclair Cake, however, is soft, creamy, and chilled. The graham crackers soak up the pudding and take on a texture similar to sponge cake—but smoother and richer.
Some prefer that cool, custard-like feel over a crumbly cake slice, especially when topped with smooth chocolate.
Storage and Serving Convenience
Another win for Chocolate Eclair Cake is how well it stores. You can make it days in advance, and it actually gets better after sitting in the fridge. Leftovers keep well for up to four days, and you can even freeze it if needed.
Baked cakes tend to dry out quickly and often lose flavor after a day or two. Plus, slicing and serving a no-bake cake is cleaner—no crumbling layers or frosting disasters.
Check out our Cheesecake Brownies for another dessert that delivers layers, flavor, and a chilled finish—just like a great eclair cake.
Presentation and Flexibility
Classic cakes have their signature look—tall, round, and frosted. But Chocolate Eclair Cake can be just as eye-catching. With its clean layers and glossy chocolate top, it’s easy to dress up with a few berries, chocolate curls, or a dusting of cocoa powder.
It’s a versatile dessert that adapts to any occasion—just switch up the flavors or toppings and it becomes a whole new treat.
Frequently Asked Questions About Chocolate Eclair Cake
What are the ingredients for Chocolate Eclair Cake?
The classic Chocolate Eclair Cake is made with just a handful of simple ingredients. You’ll need graham crackers, instant vanilla pudding mix, milk, whipped topping (like Cool Whip), and a chocolate frosting of your choice. These ingredients are layered in a dish to create a soft, cake-like texture without baking.
Many home bakers also like to customize the recipe. You can substitute homemade whipped cream or use pastry cream instead of the instant pudding if you prefer a more made-from-scratch approach. Some even top it off with ganache or fudge sauce for a richer finish.
What’s the difference between a chocolate eclair and a long john?
Although they might look alike at first glance, chocolate eclairs and long johns are actually quite different. An eclair is made from choux pastry, filled with pastry cream or custard, and topped with a glossy chocolate glaze. It’s typically light, airy, and often found in bakeries as a delicate French dessert.
A long john, on the other hand, is more like a rectangular donut. It’s made from yeast dough, deep-fried, and often filled with cream or custard—then topped with chocolate icing. While an eclair is baked and has a firmer outer shell, a long john is soft and fluffy with a more casual, American-style taste.
Chocolate Eclair Cake captures the flavor profile of an eclair but skips the pastry. It’s a clever shortcut that layers creamy pudding and chocolate over graham crackers for that same indulgent taste—without any dough.
Can you make eclair cake ahead of time?
Yes—and in fact, you should. Chocolate Eclair Cake actually gets better the longer it chills. Letting it rest in the refrigerator for at least 8 hours (or preferably overnight) gives the graham crackers time to soften and soak up the pudding layers. This transforms them into a soft, cake-like texture that holds its shape beautifully when sliced.
If you’re prepping for a party or busy week, you can even assemble it 1 to 2 days in advance. Just be sure to cover it tightly and keep it refrigerated. It stays fresh for up to 4 days—though it rarely lasts that long!
What is the most famous chocolate cake?
When it comes to world-famous chocolate cakes, the Sachertorte from Austria often tops the list. It’s a rich, dark chocolate cake layered with apricot jam and coated in a shiny chocolate glaze. Served with whipped cream, it’s been a dessert icon since the 1800s.
In the U.S., classics like devil’s food cake, German chocolate cake, and Mississippi mud cake are household names. Each version has its own fan base, whether it’s the deep chocolate flavor, creamy frosting, or rich, gooey texture.
But for fans of no-bake treats, Chocolate Eclair Cake is gaining popularity fast—it’s easy to make, incredibly satisfying, and has all the chocolatey goodness of a traditional cake with half the effort.
Serving Suggestions and Pairings
How to Serve Chocolate Eclair Cake Like a Pro
Even though Chocolate Eclair Cake is a simple dessert, it can easily be dressed up for any occasion. Whether you’re serving it at a birthday party, holiday dinner, or casual weeknight gathering, a few thoughtful touches can take your presentation to the next level.
Here’s how to elevate every slice:
- Use a sharp knife dipped in hot water to cut clean squares
- Wipe the blade between cuts for tidy layers
- Serve slices on chilled dessert plates for that extra restaurant-style feel
- Top with a fresh dollop of whipped cream or a drizzle of chocolate syrup if you’re feeling fancy
Want to go the extra mile? Garnish with shaved chocolate, fresh berries, or mint leaves to add color and flavor contrast.
What to Serve with Chocolate Eclair Cake
Since Chocolate Eclair Cake is rich, creamy, and chocolatey, it pairs best with light, refreshing sides or drinks that cleanse the palate and balance the sweetness.
✅ Perfect Pairings:
| Item | Why It Works |
|---|---|
| Fresh strawberries or raspberries | Add brightness and tang to contrast the richness |
| Cold milk or almond milk | Classic combo that enhances chocolate flavors |
| Hot coffee or espresso | Cuts through the creaminess and adds depth |
| Vanilla or caramel lattes | Complements the cake’s layers without overpowering |
| Sparkling water with lemon | Light and bubbly refreshment after a creamy dessert |
If serving for a crowd, consider offering a mix of hot and cold beverage options so guests can enjoy their slice their way.
Serving Temperature: Cold is Key
This dessert is meant to be enjoyed chilled. After it’s fully set in the fridge, let it sit out for about 5 to 10 minutes before slicing—but not too long. The cool temperature keeps the layers intact and the texture creamy.
Warm weather? Serve it directly from the fridge. Cold days? Let it rest briefly before plating to soften slightly and enhance the flavor.
Party-Ready or Solo Treat
Whether you’re serving a crowd or treating yourself to a quiet night in, Chocolate Eclair Cake fits the moment. It stores well, slices clean, and always delivers. If you’re hosting, consider making a double batch—it disappears fast!

Conclusion: Why Chocolate Eclair Cake Deserves a Spot in Your Dessert Rotation
If you’re looking for a dessert that delivers rich chocolate flavor, creamy texture, and all the comfort of a homemade treat—without the hassle of baking—Chocolate Eclair Cake checks every box. It’s the kind of recipe that’s simple enough for a weeknight, but impressive enough to bring to a gathering.
With just a few ingredients and some chill time, you’ll have a crowd-pleasing dessert that gets better by the hour. Whether you stick to the classic version or try one of the tasty twists—like adding fruit or a swirl of peanut butter—you’re guaranteed a cake that’s easy to love and hard to forget.
So the next time you need a quick dessert fix or a make-ahead option for guests, skip the oven. Reach for your graham crackers, pudding, and frosting—and layer up something magical.